Advice and answers from the Rixbo Team
Manage Product lets admins add, edit, and organize products easily. Admins can set prices, stock levels, and categories through a user-friendly dashboard. It ensures accurate listings, faster updates, and better inventory control, boosting sales efficiency and giving customers a smooth, reliable shopping experience.
Log in to the Admin panel and open the Dashboard.
Navigate to POS from the left menu.
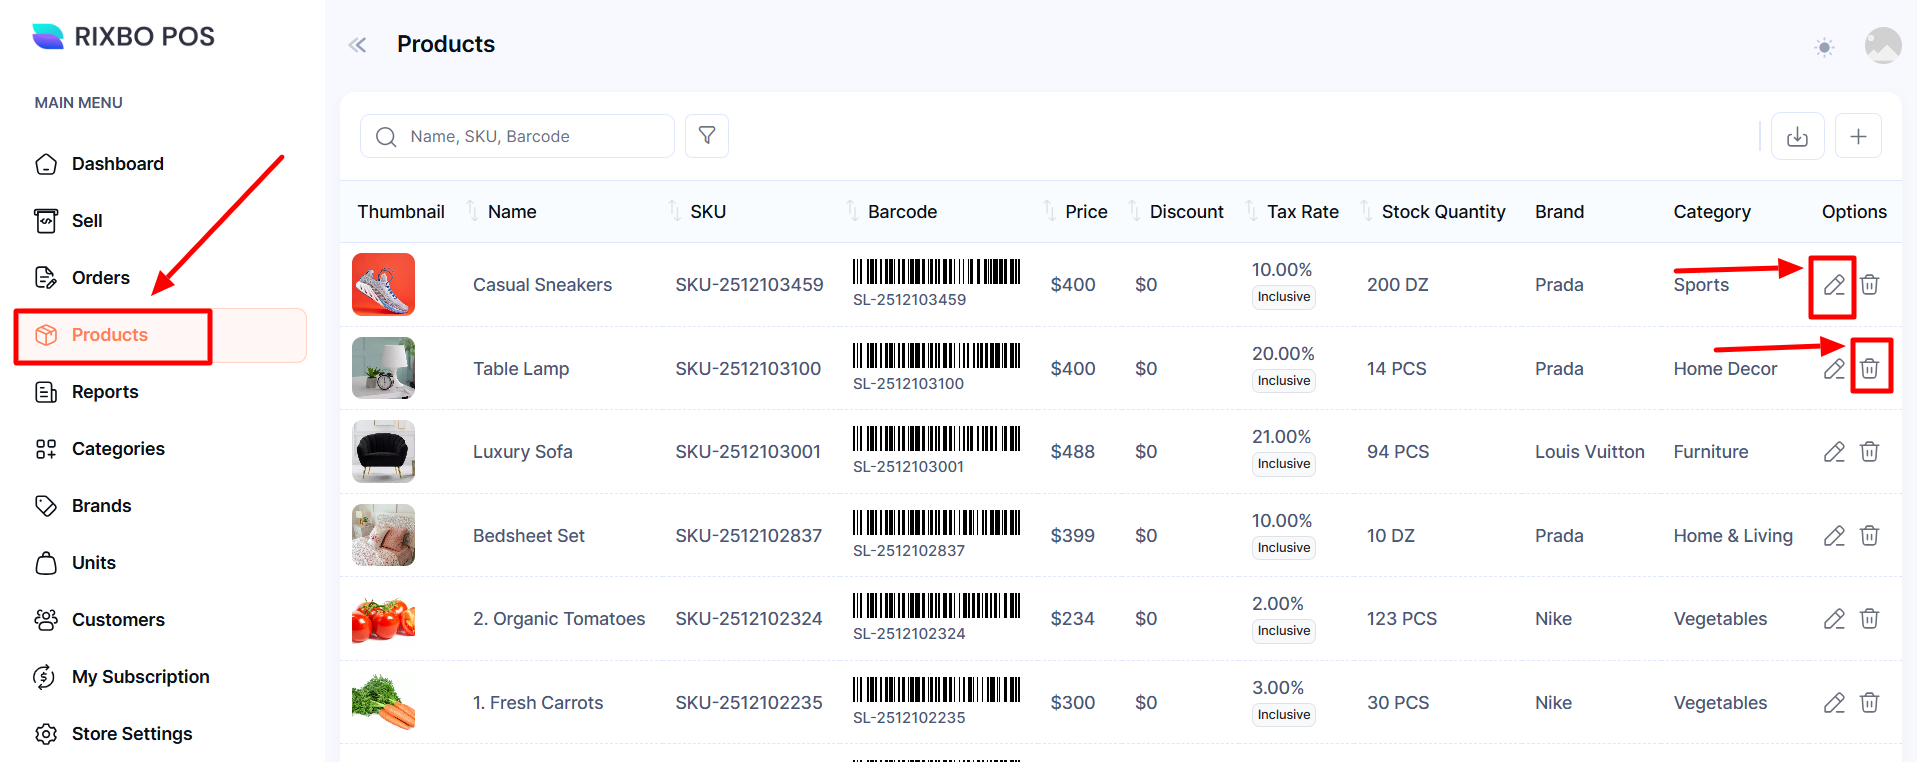
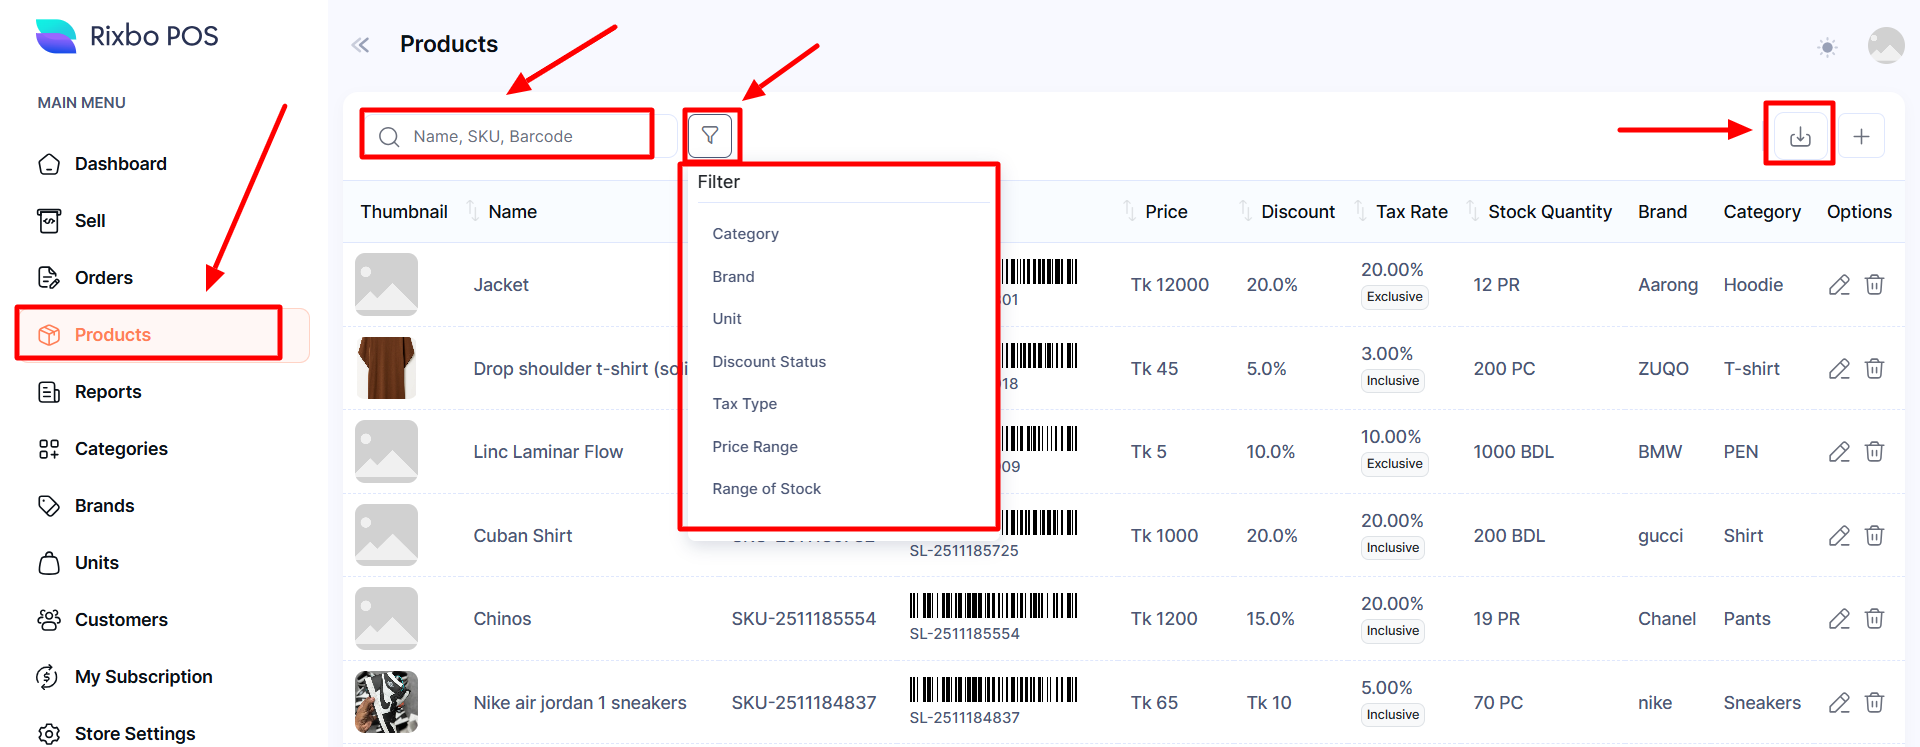
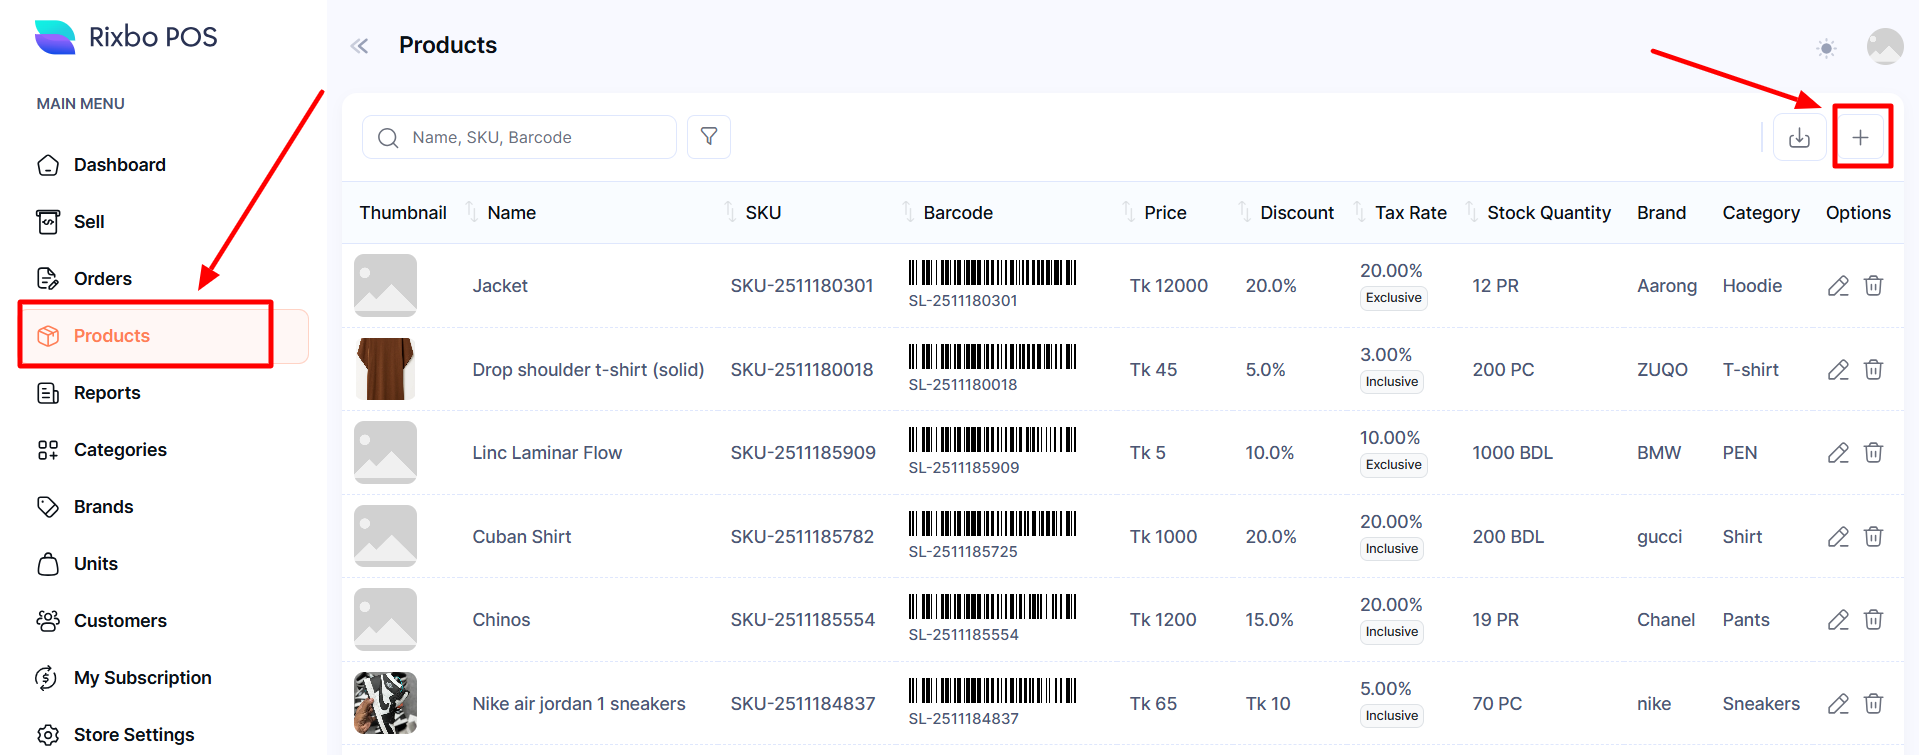
Finally, click Products from the left menu, and a new window will appear.
Click the Search button and type the desired Name to view.
Click the Filter button, and a new window will pop up.
Select your desired option from the drop-down.
Click the download button, appeared list will be exported as a PDF or CSV file.
Log in to the Admin panel and open the Dashboard.
Navigate to POS from the left menu.
Finally, click Products from the left menu, and a new window will appear.
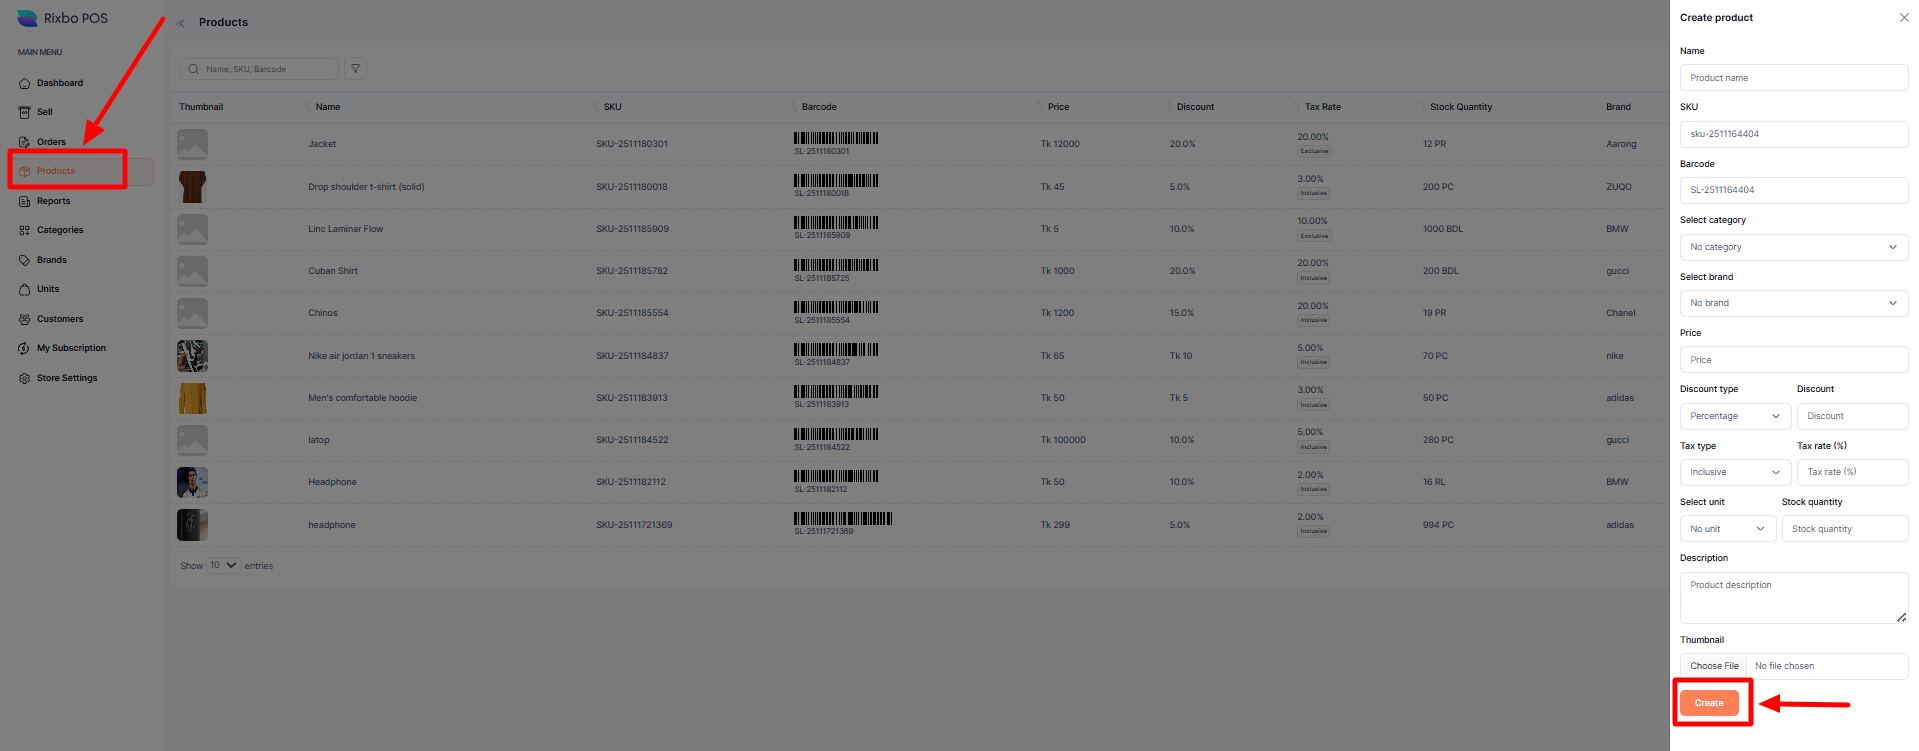
Click the + (Plus) sign an entry form will appear.
Fill in the following details:
Name: Enter the brand name in the designated field.
SKU: Provide a SKU number in the relevant field.
Barcode: Enter the Barcode in the respective field.
Select Category: Select your desired category from the dropdown menu.
Select Brand: Select your desired brand from the drop-down menu.
Price: Put the desired price in the designated field.
Discount Type: Select the discount type from the drop-down menu.
Discount: Put the discount amount in the relevant field.
Tax Type: Select the tax type from the drop-down menu.
Tax Rate (5%): Put the tax rate in the respective field.
Select Unit: Select your desired unit from the drop-down menu.
Stock Quantity: Put the stock quantity in the designated field.
Description: Provide the relevant product description in the desired field.
Thumbnail: Click the Choose File button to upload the relevant image.
Once all the fields are completed, click the Create button to save the information.
Log in to the Admin panel and open the Dashboard.
Navigate to POS from the left menu.
Finally, click Products from the left menu, and a new window will appear.
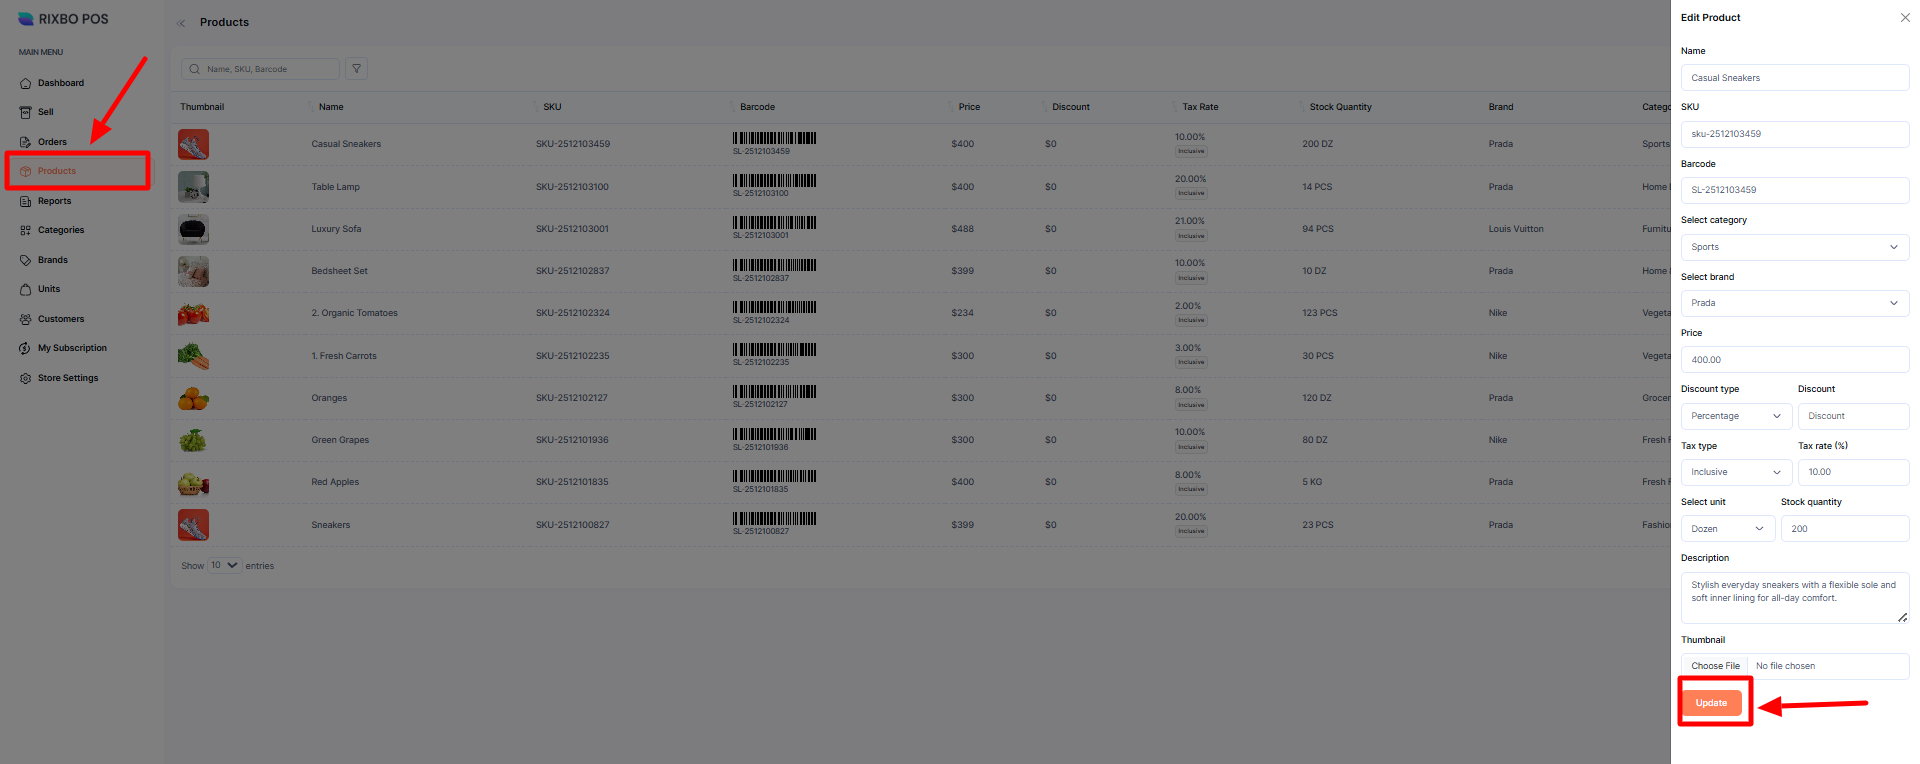
Click the Pen sign button, and an entry form will appear.
Fill in the following details:
Name: Enter the brand name in the designated field.
SKU: Provide a SKU number in the relevant field.
Barcode: Enter the Barcode in the respective field.
Select Category: Select your desired category from the drop-down menu.
Select Brand: Select your desired brand from the drop-down menu.
Price: Put the desired price in the designated field.
Discount Type: Select the discount type from the drop-down menu.
Discount: Put the discount amount in the relevant field.
Tax Type: Select the tax type from the drop-down menu.
Tax Rate (%): Put the tax rate in the respective field.
Select Unit: Select your desired unit from the drop-down menu.
Stock Quantity: Put the stock quantity in the designated field.
Description: Provide the relevant product description in the desired field.
Thumbnail: Click the Choose File button to upload the relevant image.
Once all the fields are completed, click the Update button to save the information.
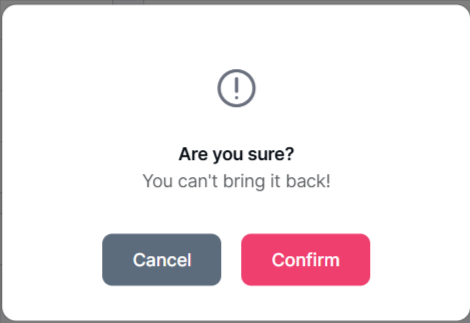
If you click the Delete button, a confirmation window will pop up.
If you click the Confirm button, the category will be automatically deleted; otherwise, click the Cancel button.