Advice and answers from the Rixbo Team
Manage Customer lets admins view and organize all customer information in one place. Admins can update profiles, track purchase history, and segment customers easily. It helps deliver personalized service, improve communication, and boost satisfaction, leading to stronger relationships and increased repeat sales.
Log in to the Admin panel and open the Dashboard.
Navigate to POS from the left menu.
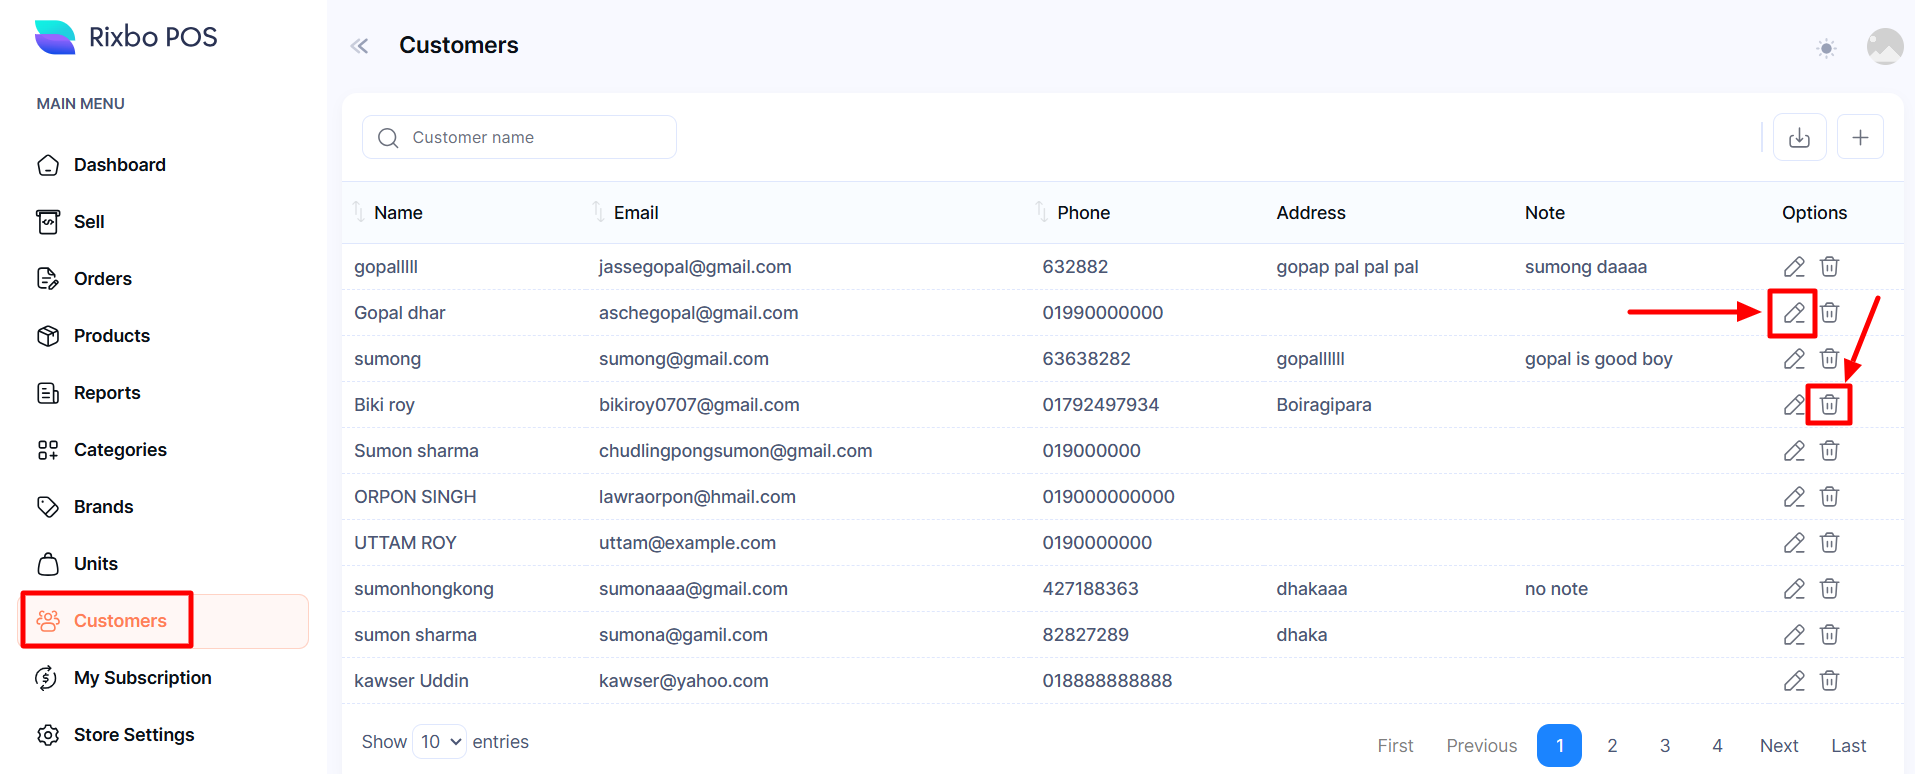
Finally, click Customers from the left menu, and a new window will appear.
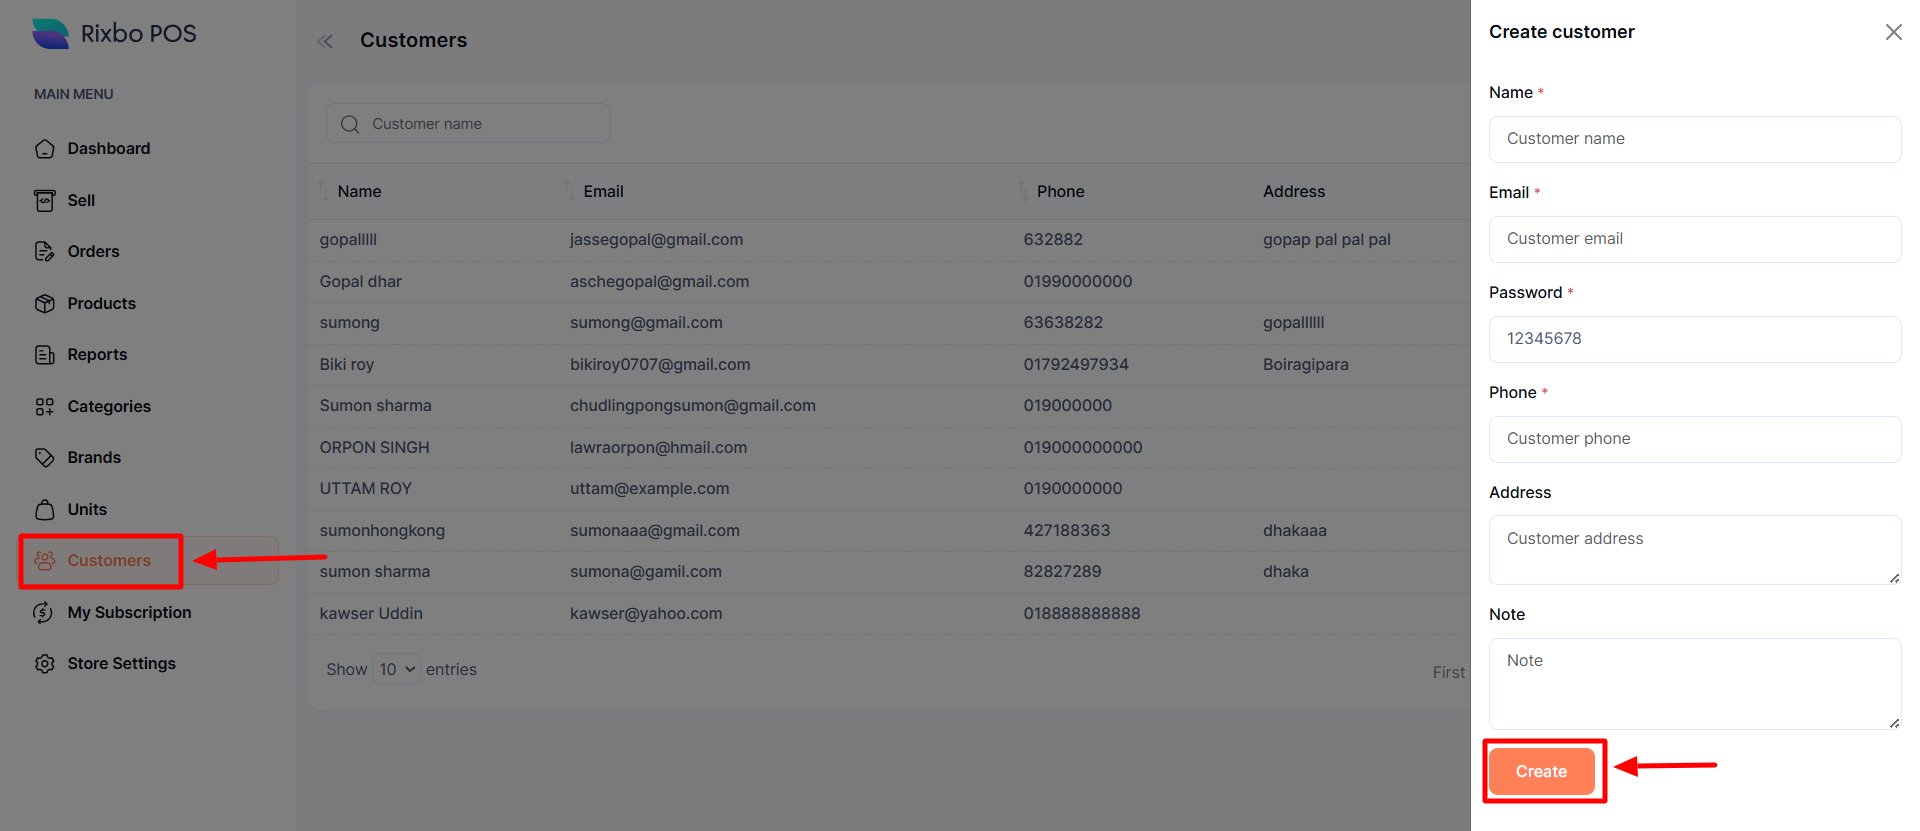
Click the + (Plus) sign an entry form will appear.
Fill in the following details:
Name: Enter the customer name in the relevant field.
Email: Provide a relevant email in the email address field.
Password: Provide the desired password in the password field.
Phone: Enter your phone number in the Phone field.
Address: Type the full address of the customer in the address field.
Note: Provide the desired note in the respective field.
Once all the fields are completed, click the Create button to save the information.

Log in to the Admin panel and open the Dashboard.
Navigate to POS from the left menu.
Finally, click Customers from the left menu, and a new window will appear.
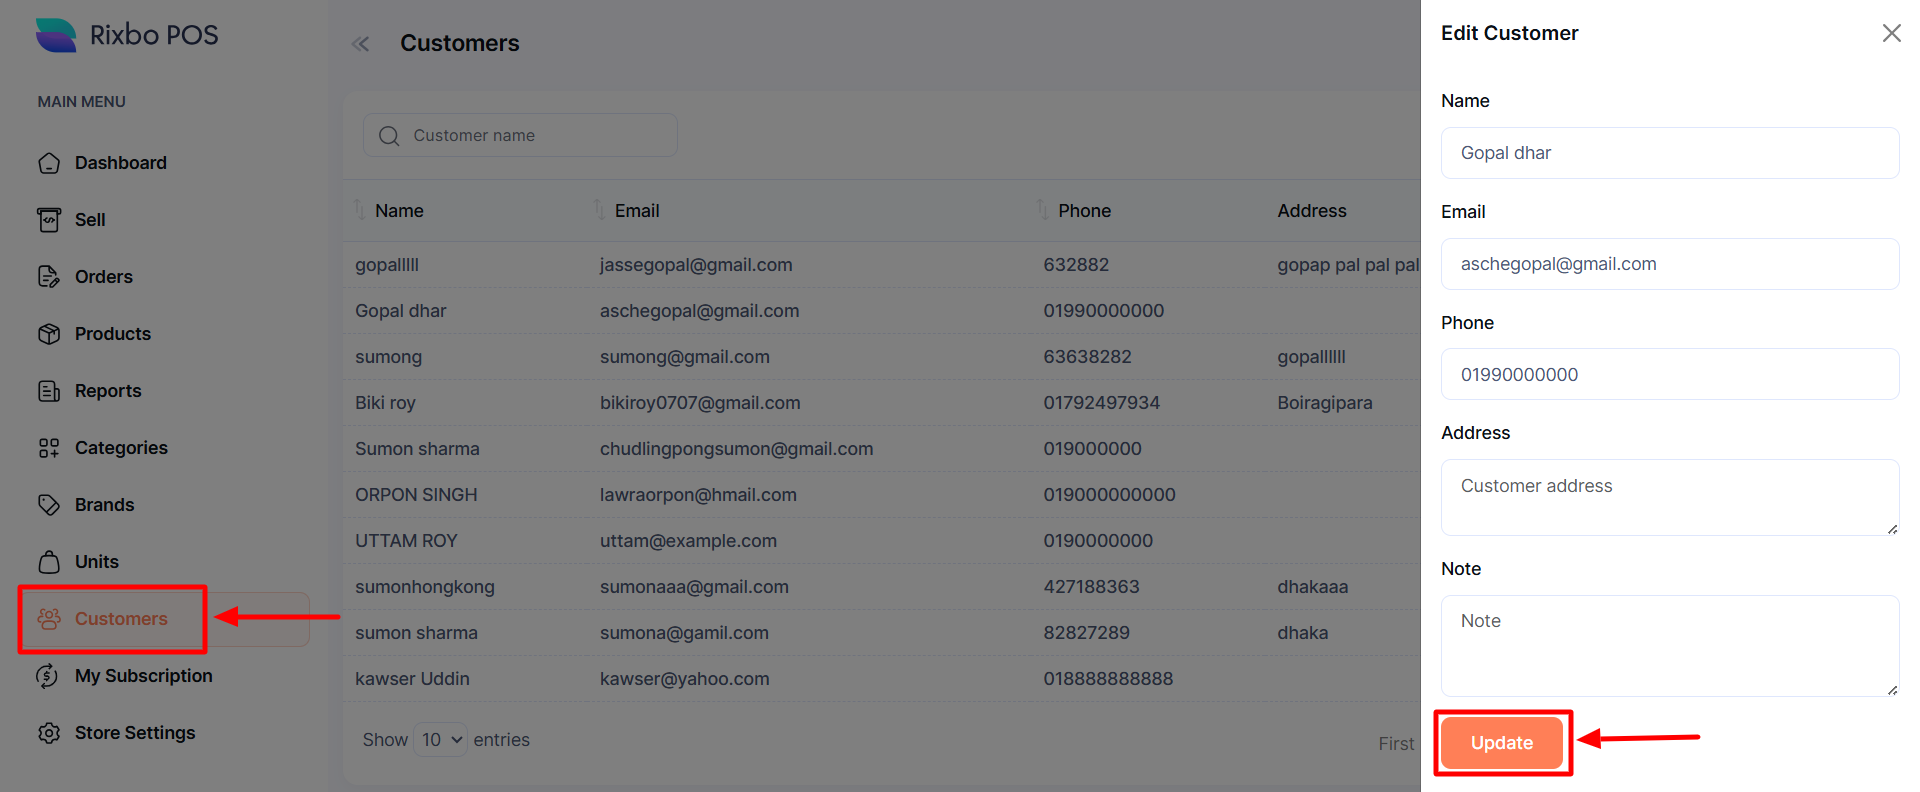
Click the Pen sign, and an entry form will appear for the respective customer.
Fill in the following details:
Name: Enter the customer name in the relevant field.
Email: Provide a relevant email in the email address field.
Phone: Enter your phone number in the Phone field.
Address: Type the full address of the customer in the address field.
Note: Provide the desired note in the respective field.
Once all the fields are completed, click the Update button to save the information.
If you click the Delete button, a confirmation window will pop up.
If you click the Confirm button, the category is deleted automatically; otherwise, click the Cancel button.